- Assumption
- Make sure you installed the Windows Latest version.
- Complete all necessary Windows update.
*At some patch level, there is a case that sysprep has the bug. - Complete the installation of Applications that is required as a part of master image PC.
- You don’t have to join the machine to the Domain.
- You don’t have to assign the right PC name and workgroup name.
- During the imaging, you want the administrator user account profile as the default profile for new user getting logged into the PC later.
- Step
- Restart the machine in order to make sure all machine state is clean.
- Logon as the administrator user.
- This is NOT recommended but if you wish to apply the Desktop setting made in admin users running the sysprep comand, create the custom unattended file for copying the administrator user profile to the default user profile. And place it somewhere in the PC folder. Below is example.
* ZIP file is attached to this article.
<?xml version=”1.0″ encoding=”utf-8″?>
<unattend xmlns=”urn:schemas-microsoft-com:unattend”>
<settings pass=”specialize”>
<component name=”Microsoft-Windows-Shell-Setup” processorArchitecture=”amd64″ publicKeyToken=”31bf3856ad364e35″ language=”neutral” versionScope=”nonSxS” xmlns:wcm=”http://schemas.micro…fig/2002/State” xmlns:xsi=”http://www.w3.org/20…hema-instance”>
<CopyProfile>true</CopyProfile>
<DoNotCleanTaskBar>true</DoNotCleanTaskBar>
<RegisteredOrganization>Watanabe lab</RegisteredOrganization>
</component>
<component name=”Microsoft-Windows-Shell-Setup” processorArchitecture=”x86″ publicKeyToken=”31bf3856ad364e35″ language=”neutral” versionScope=”nonSxS” xmlns:wcm=”http://schemas.micro…fig/2002/State” xmlns:xsi=”http://www.w3.org/20…hema-instance”>
<CopyProfile>true</CopyProfile>
<DoNotCleanTaskBar>true</DoNotCleanTaskBar>
<RegisteredOrganization>Watanabe lab</RegisteredOrganization>
</component>
</settings>
<settings pass=”windowsPE”>
<component name=”Microsoft-Windows-Setup” processorArchitecture=”amd64″ publicKeyToken=”31bf3856ad364e35″ language=”neutral” versionScope=”nonSxS” xmlns:wcm=”http://schemas.micro…fig/2002/State” xmlns:xsi=”http://www.w3.org/20…hema-instance”>
<UseConfigurationSet>true</UseConfigurationSet>
</component>
</settings>
<cpi:offlineImage cpi:source=”wim:c:/users/tech/desktop/install.wim#Windows 8 Pro” xmlns:cpi=”urn:schemas-microsoft-com:cpi” />
</unattend> - Now open command prompt as Administrator mode. Move to c:\Windows\System32\sysprep

- if you use the copyprofile approach, run the following sysprep command.
*copyProfile.xml is the one you created at previous step.
*Specify the proper path of xml file according to your env.
>Sysprep.exe /generalize /oobe /shutdown /unattend:c:\Resources\CopyProfile.xml - If you do not use the unattended file.
>Sysprep.exe /generalize /oobe /shutdown
- System clean-up will run and complete. The machine will be shut down. Imaging completes in this step. You must not touch the machine.

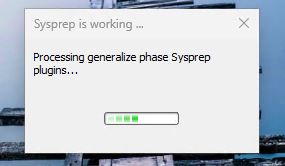
- System clean-up will run and complete. The machine will be shut down. Imaging completes in this step. You must not touch the machine.
- Restart the machine in order to make sure all machine state is clean.
- Troubleshooting
- There is a case that the generalization fails and the process immediately get abort.
Please check the log found in “C:\Windows\System32\Sysprep\Panther\setuperr.log”
Very generic case is the language pack installed per user.
you can find the package name and try removing the package as below on Powershell administrator mode.
*Note: Package name does not require the version number seen in Error log report.
> Get-AppxPackage -allUsers -Name “*package name you found in error log*” |Remove-AppxPackage
Repeat the sysprep attempt and remove all package till the sysprep accepts the command. - We encountered with another case saying that the “SYSPRP Bitlocker-Syspre: Bitlocker is on for the OS volume…”
To make the bitlocker turned off exactly, run the following command from Administrator mode command prompt.
>manage-bde -off c:
>manage-bde -status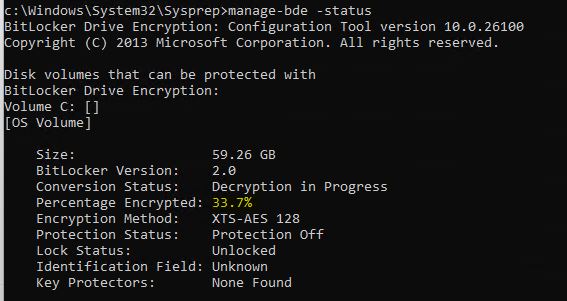
Percentage will need to reach to 0%.
Make sure the decryption completes, and encryption shows 0%.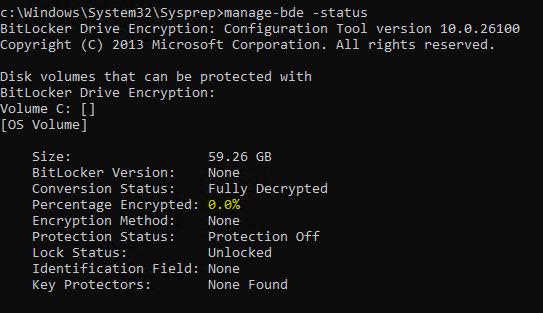
In above, you can start the sysprep again.
- There is a case that the generalization fails and the process immediately get abort.